
A few days ago, I received a letter in the mail from the IRS. I opened the letter, worried that I might have screwed up my taxes and would now owe the United States Government a ridiculous amount of money. It turns out, that might have been better news than the news I got. The letter explained that somebody else was using my social security number.
Wait, what! How did somebody else get my social security number? The obvious answer is that somebody who was entrusted with the safekeeping of my secret information failed to uphold their responsibility to keep that information safe. Pardon my language, but that person is a real *$%&^! Once your information is compromised, it is compromised forever. My social security number will be out in the wild for the rest of my life, and that is a terribly annoying burden that I will have to live with. If only the person responsible had done their job right.
It was probably Equifax…
This article is the first part of a several part tutorial series detailing how to properly implement an authentication system when building a web application. My hope is that you will learn enough from this tutorial that you will be able to keep your application user’s information protected so that you won’t be the *$%&^ that enables nefarious actors to get their hands on other people’s secrets. Your users put a great deal of trust in you. Do not let them down.
As a framework for keeping track of our progress, we are going to use the OWASP (Open Web Application Security Project)’s list of authentication verification requirements. The tutorial will continue until we have a check next to every single item on that list.
There are three components to our strategy as we implement our authentication system:
- Never leak information an attacker can use
- Slow an attacker down to make it more difficult to break in
- Layer security so that the one part of the system failing does not compromise the whole system
Properly implementing an authentication system is no trivial task. Strap in...this is going to be a long, bumpy ride. And this is just part 1!
Setting up
For this tutorial, we will be using node.js, express, and MongoDB. There is a fair amount of boilerplate to write to get the application ready to work with. Fortunately for you, I’ve already taken care of getting everything ready! All you have to do is clone a repository.
Prerequisites:
- You must have node.js (>= v8.0.0) installed
- You need a running MongoDB (>= v3.2) instance
You can get up and running with the following:
npm install -g degit
degit https://github.com/mwardle/authentication-tutorial.git#boilerplate
cd authentication-tutorial
npm install
You should create a .env file in the root of the project directory with contents that look similar to the following:
# disable secure cookies for dev
MYAPP_SECURE_COOKIES=false

# secrets for cookie signing, current one comes first
MYAPP_COOKIE_SECRETS='["thisisasecret"]'

# no proxy in dev, change for production if using nginx, etc.
MYAPP_TRUST_PROXY=false

# mongodb database connection string for session data
MYAPP_MONGODB_SESSION_URI=mongodb://127.0.0.1:27017/myappsessions

# mongodb database connection string for application data
MYAPP_MONGODB_URI=mongodb://127.0.0.1:27017/myapp
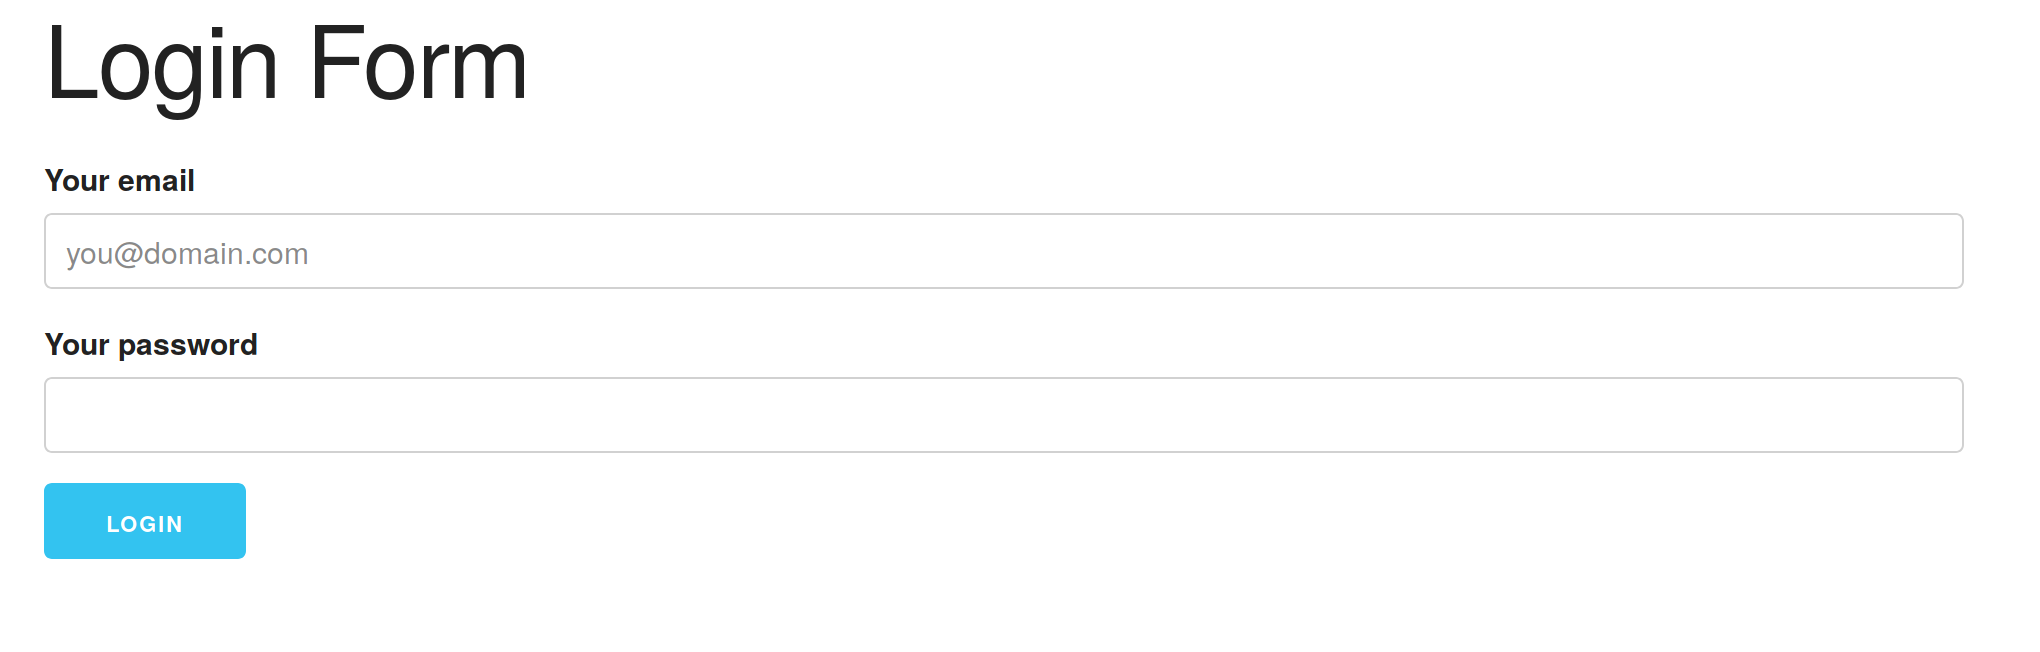
Once that is done, you can start the application by running npm start. If you go in your browser to http://localhost:4000 you should see a page that looks like this:
 Of course, the page is lying to you, since you are definitely not logged in! Let’s fix that.
Create a login form
The first thing we need for our users to login to our application is a login form. To do that, we need a touch of HTML. The sample application uses EJS as a template processor. It is a relatively simple template language and should be fairly easy to understand even if you are not familiar with it.
<%# file: templates/pages/login %>
<!DOCTYPE html>
<html lang="en">
<head>
   <% include ../partials/head %>

   <style>.error-message {background: red; color: white; padding: 1em; margin-bottom: 1em;}</style>
</head>
<body class="container">

<main>
 <h1>Login Form</h1>
 <form method="POST">
   <div class="row">
     <div class="twelve columns">
       <label for="email">Your email</label>
       <input class="u-full-width" placeholder="you@domain.com" name="email" id="email" type="email" value="<%= form.email %>">
     </div>
     <div class="twelve columns">
       <label for="password">Your password</label>
       <input class="u-full-width" placeholder="" name="password" id="password" type="password">
     </div>
   </div>
   <div class="error-message" style="display: <%= errorMessage === '' ? 'none' : 'block' %>;"><%= errorMessage %></div>
   <input class="button-primary" value="Login" type="submit">
 </form>
</main>

</body>
</html>
Notice that we are not auto-filling the the password field with previously submitted information. We will not be reflecting this information back to the user anywhere. Protecting these sorts of secrets is in fact one of the OWASP authentication requirements we are working towards implementing.
#2.2 - Verify that the application does not automatically fill in credentials – either as hidden fields, URL arguments, Ajax requests, or in forms, as this implies plain text, reversible or de-cryptable password storage. Random time limited nonces are acceptable as stand ins, such as to protect change password forms or forgot password forms.
We have not violated this requirement yet, but will need to make sure that this stays true as we move forward with the implementation. We are auto-filling the previously submitted email. I believe that this is okay. If you need to be extra cautious in your application, do not auto-fill the email.
We need to tell our application to use the template we just created. The tutorial source code already has a stub authentication router at lib/routers/authRouter.js. Open the file and replace the section beginning with router.get(‘auth/login’, /* function */) with this:
router.get('/auth/login', (req, res) =>
{
   let errorMessage = '';
   if (req.session.loginError)
   {
       // Cycle the error message
       errorMessage = req.session.loginError;
       delete req.session.loginError;
   }

   res.render('pages/login', {errorMessage});
});
Then, add a success route so we know that we logged in successfully:
// success route for the login form
router.get('/auth/login/success', (req, res) =>
{
   const pageData = {
       successMessage: 'Congratulations! You\'re logged in!',
       linkHref: '/',
       linkText: 'Go to the admin page',
   };

   res.render('pages/success', pageData);
});
Restart the application and visit http://localhost:4000/auth/login. You should see a login form:
 And that’s it! Our work here is done!
I’m joking, of course. Try submitting the form and you get an error message about not being able to POST to /auth/login. The real work has only just begun…
Enforce a secure connection
We need to make the form work. However, before we can do that, we need to fix one problem. Currently, the application does not care whether or not the form is submitted with HTTP or HTTPS. Enforcing SSL in all data interchanges between the client and the server is another requirement from the OWASP.
#2.16 - Verify that all application data is transmitted over an encrypted channel (e.g. TLS).
If you are using a forwarding proxy service like nginx (which you should be), you can perform a redirect from HTTP to HTTPS there. For example, your nginx file might look like this if also running behind a load balancer:
upstream myapp {
   server 127.0.0.1:4000;
   keepalive 256;
}
server {
   listen 8080;
   server_name api.instalink.io;

   # redirect if not an https connection
   if ($http_x_forwarded_proto != 'https') {
       return 307 https://api.instalink.io$request_uri;
   }

   location / {
       proxy_pass            http://myapp;
       proxy_http_version    1.1;
       proxy_set_header      Host           $host;
       proxy_set_header      X-Real-IP      $remote_addr;
       proxy_set_header      X-Forwarded-For $proxy_add_x_forwarded_for;
   }
}
Whether or not you are using a forwarding proxy server to handle HTTP to HTTPS redirection, we need our application to ensure that the connection is secure. This is part of our strategy to use layered security; if the proxy server failed (e.g. it was temporarily mis-configured), our application would still be enforcing a secure connection. Our implementation will enforce ssl for every connection the server receives and return a 403 Forbidden error response if the connection is not over SSL. However we will allow this to be turned off with an environment variable, solely for the sake of local development.
We will implement our SSL enforcement logic as an express middleware function. Create a file with the path lib/middleware/enforceSecureConnection.js with the following contents:
// File: lib/middleware/enforceSecureConnection.js
function createEnforceSecureConnectionMiddleware(env)
{
   const {
       // Enforce secure connection by default
       enforceSecureConnection = true,
   } = env;

   return function enforceSecureConnectionMiddleware(req, res, next)
   {
       if (enforceSecureConnection && !req.secure)
       {
           const errorMessage = 'You must use a secure connection. Try using a url that begins with https://.';
           res.status(403).render('pages/error', {errorMessage});
           return;
       }

       next();
   };
}

module.exports = createEnforceSecureConnectionMiddleware;
Please note that this function may not work as intended if you do not properly configure the application’s Trust Proxy setting. For more information on this see http://expressjs.com/en/4x/api.html#trust.proxy.options.table.
We need our application to use the middleware we just made. Add the following near the top of your app.js file:
const enforceSecureConnection = require('./lib/middleware/enforceSecureConnection');
Then, add the following immediately after the last app.set() function call and before any other app.use() function calls.
app.use(enforceSecureConnection(env));
The boilerplate code already has an error page template, so we don’t need to worry about it.
Restart the application and try to visit any page at http://localhost:4000. No matter what page you visit, you should see an error message. The page might also look strange since the CSS will also not load without a secure connection. If the styles bother you, and you are not concerned about your public assets being secure, you can move the app.use() function call for the static middleware so that it is before the inclusion of the secure connection middleware.

Good. Now, lets turn it off so we can keep working. Add the following to your .env file:
# don't enforce https protocol during development
MYAPP_ENFORCE_SECURE_CONNECTION=false
If you restart the application, it should no longer show you the error message.
Make the login form do something
Alright. Let’s get to the meat and potatoes of this tutorial. We need to properly authenticate a user when they attempt to login with their email and password. The first thing we need is a POST route. Open up the file at lib/routers/authRouter.js and add the following near the top of the file:
const Authenticator = require('../security/Authenticator');

Then add the POST route immediately after the existing GET route.

router.post('/auth/login', (req, res) =>
{
   const {
       email,
       password,
   } = req.body;

   Authenticator.authenticate({email, password}, (err, user) =>
   {
       if (err != null)
       {
           // Something didn't work right

           // TODO: Respond with 500 for XHR / json requests instead of a redirect
           req.session.loginError = 'An error occurred while trying to authenticate you. Please wait a few minutes and try logging in again.';

           // Under no circumstances should include the password here!
           req.session.loginForm = {email};

           res.redirect(303, '/auth/login');
           return;
       }

       if (user == null)
       {
           // Login failed
           req.session.loginError = 'Login failed. Please check your email address and password and try again.';

           // Under no circumstances should you include the password here!
           req.session.loginForm = {email};

           res.redirect(303, '/auth/login');
           return;
       }

       // Login worked!
       // Redirect to login success page
       res.redirect(303, '/auth/login/success');
   });
});
At this point, the program won’t run because there is no file at lib/security/Authenticator.js. Let’s fix that.
// File: lib/security/Authenticator.js
const Authenticator = module.exports;

Authenticator.authenticate = function authenticateUser(credentials, callback)
{
   // TODO: authenticate
   callback(new Error('Not Implemented'));
};
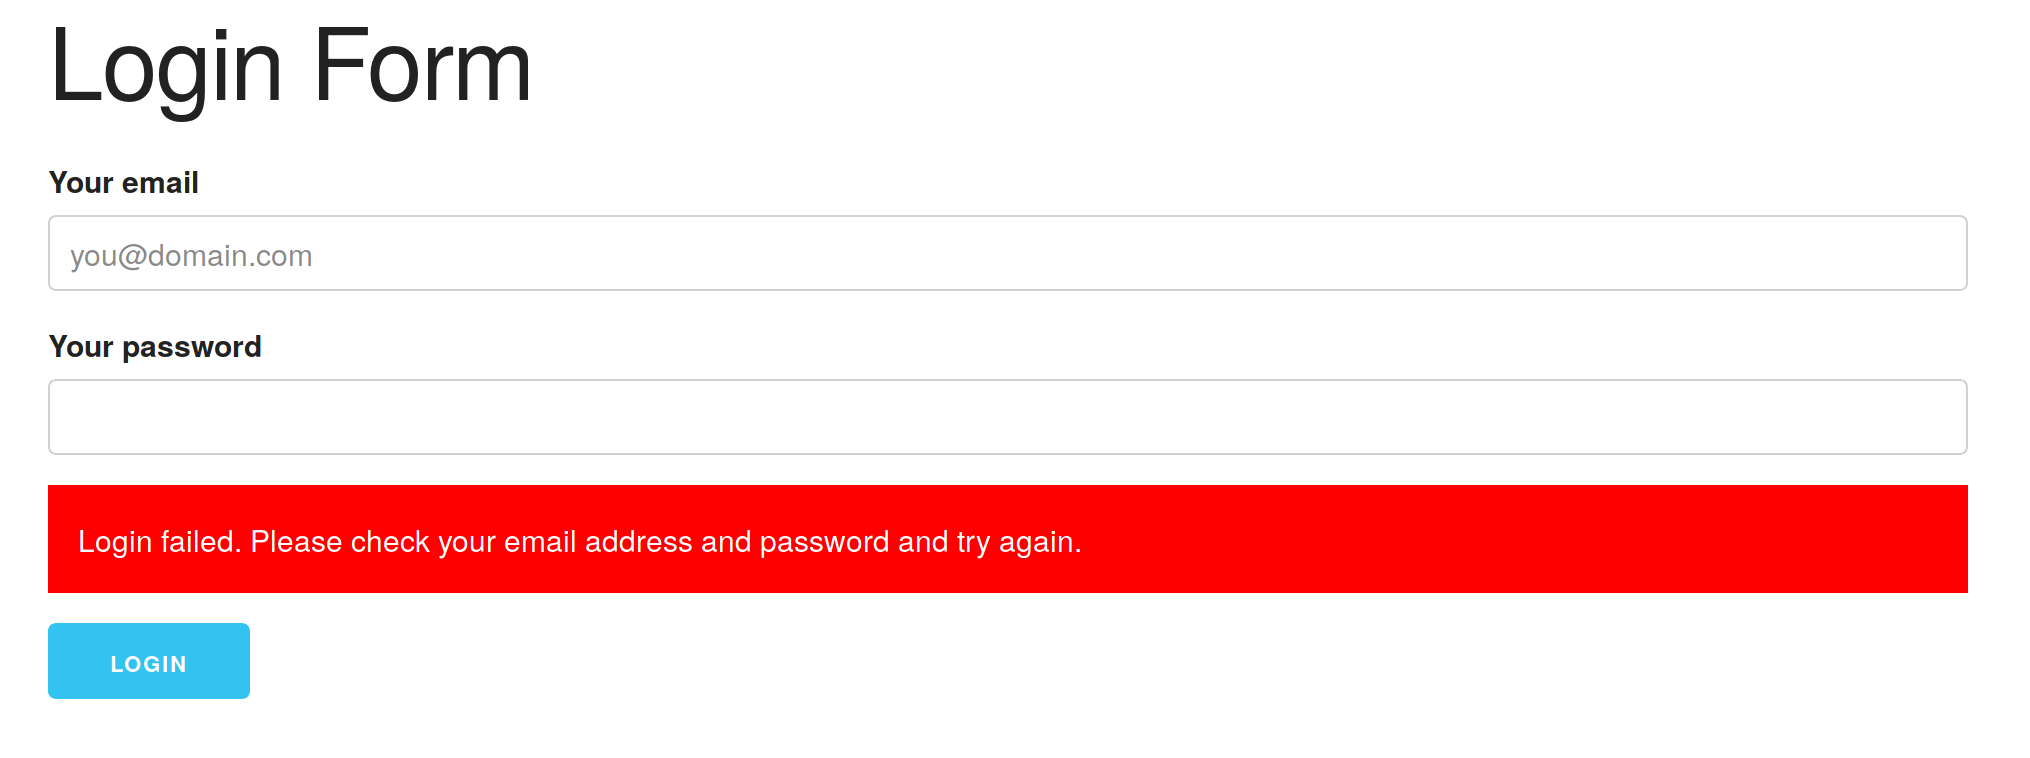
Finally! We can submit the login form. Restart the application and go to http://localhost:4000/auth/login. Click the “login” button. You should be returned to the page you were just on, but there should be a big red error message:
Create a model for users
It doesn’t really make sense to have a form where users can login when we don’t have users! Let’s create a user model.
By the way, the boilerplate application uses a super-fake Object-Document Mapper library and should definitely not be used in a production application. It doesn’t do validation or anything! It is meant to get the point across about what is going on, not to be incredibly functional.
// File lib/models/User.js
const createModel = require('./createModel');

const User = createModel('User', {
   collection: 'users',
   properties: {
       _id: {
           type: 'objectid',
       },
       email: {
           type: 'string',
           validationType: 'email',
       },
       hashedPassword: {
           type: 'string',
           sensitive: true,
       },
   },
   indexes: [
       {
           name: 'emailUniqueIndex',
           fields: {email: 1},
           unique: true,
       },
   ],
});

module.exports = User;
We are keeping our user model absurdly basic. We have an _id property (every MongoDB document has this property), a unique email address, and a hashed password. We mark the hashed password as sensitive so that we know that it should never be logged for any reason. We are not canonicalizing the email address, though in a real application this would be a good idea (e.g. ME@SOMEWHERE.com should be considered equal to me@somewhere.com).
Great. Now we need a registration form so users we can get some users into our system.
User registration
Let’s quickly create a registration form so we can move on to bigger things.
First, create page template at templates/pages/register.ejs.
<%# file: templates/pages/register %>
<!DOCTYPE html>
<html lang="en">
<head>
   <% include ../partials/head %>

   <style>.error-message {background: red; color: white; padding: 1em; margin-bottom: 1em;}</style>
</head>
<body class="container">

<main>
 <h1>Registration Form</h1>
 <form method="POST">
   <div class="row">
     <div class="twelve columns">
       <label for="email">Your email</label>
       <input class="u-full-width" placeholder="you@domain.com" name="email" id="email" type="email" value=<%= form.email %>>
     </div>
     <div class="twelve columns">
       <label for="password">Your password</label>
       <input class="u-full-width" placeholder="happy henry hates hippos" name="password" id="password" type="password">
     </div>
     <div class="twelve columns">
       <label for="passwordAgain">Repeat your password</label>
       <input class="u-full-width" placeholder="happy henry hates hippos" name="passwordAgain" id="passwordAgain" type="password">
     </div>
   </div>
   <div class="error-message" style="display: <%= errorMessage === '' ? 'none' : 'block' %>;"><%= errorMessage %></div>
   <input class="button-primary" value="Register" type="submit">
 </form>
</main>

</body>
</html>
Then add these two routes to the auth router.
// In File: lib/router/authRouter.js
router.get('/auth/register', (req, res) =>
{
   let errorMessage = '';
   let form = {email: ''};
   if (req.session.registrationError)
   {
       // Cycle the error message
       errorMessage = req.session.registrationError;
       delete req.session.registrationError;
   }
   if (req.session.registrationForm)
   {
       form = req.session.registrationForm;
       delete req.session.registrationForm;
   }
   res.render('pages/register', {errorMessage, form});
});

router.get('/auth/register/success', (req, res) =>
{
   const pageData = {
       successMessage: 'Congratulations! You\'re registered!',
       linkHref: '/auth/login',
       linkText: 'Now go login',
   };

   res.render('pages/success', pageData);
});
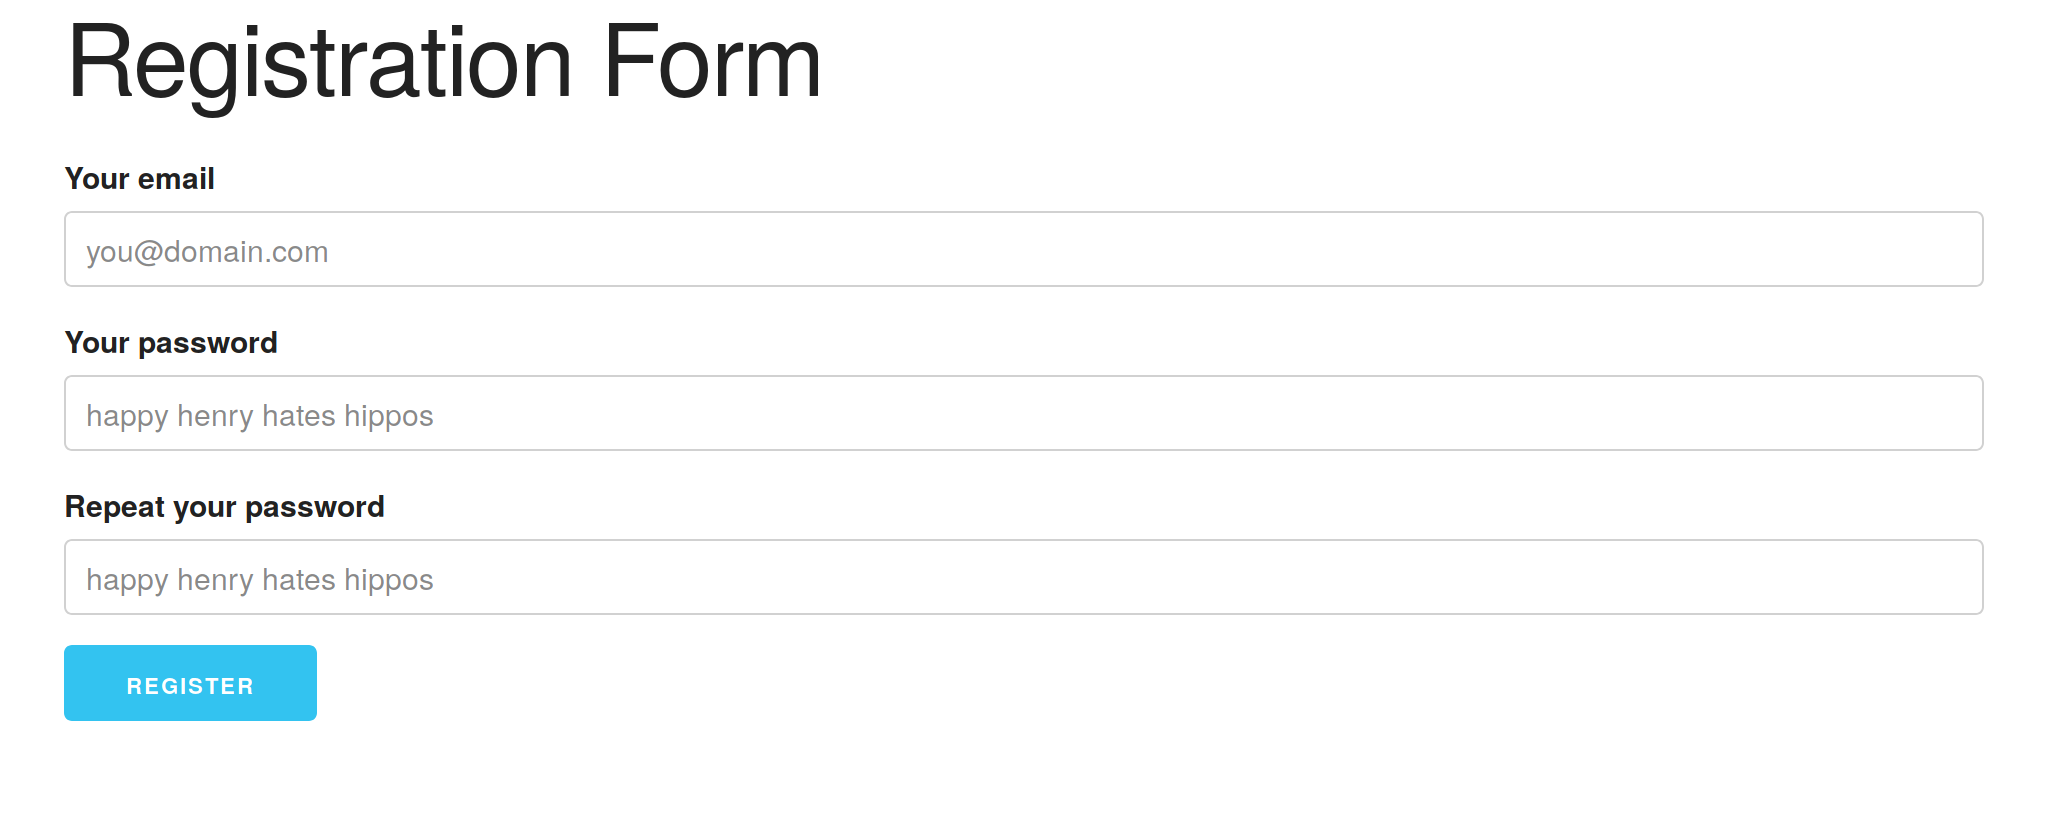
Restart the application and go to http://localhost:4000/auth/register. You should see a form like this one:
Let’s also add a link to the registration form on the login page for easier access.
<p>Don't have an account? <a href="/auth/register">Register</a></p>
Now let’s write the logic to create the user. Near the top of the lib/routers/authRouter.js file, add the following requires:
const isValidEmail = require('../util/isValidEmail');
const User = require('../models/User');
And then immediately after the GET route we just made:
router.post('/auth/register', (req, res) =>
{
   const {
       email,
       password,
       passwordAgain,
   } = req.body;

   // Under no circumstances should you put the password or repeated password here!
   const registrationForm = {email};

   if (!isValidEmail(email))
   {
       req.session.registrationError = 'You must provided a valid email.';
       req.session.registrationForm = registrationForm;
       res.redirect(303, '/auth/register');
       return;
   }

   if (password !== passwordAgain)
   {
       req.session.registrationError = 'The passwords do not match.';
       req.session.registrationForm = registrationForm;
       res.redirect(303, '/auth/register');
       return;
   }

   Authenticator.validatePassword(password, (err) =>
   {
       if (err != null)
       {
           req.session.registrationError = err.message;
           req.session.registrationForm = registrationForm;
           res.redirect(303, '/auth/register');
           return;
       }

       // password is acceptable

       Authenticator.encryptPassword(password, (err, hashedPassword) =>
       {
           if (err != null)
           {
               // TODO: log the error for review
               req.session.registrationError = 'Unable to create the account. Please try again in a few minutes, or reset your password if you are already registered.';
               req.session.registrationForm = registrationForm;
               res.redirect(303, '/auth/register');
               return;
           }

           const user = User({email, hashedPassword});
           User.insertOne(user, (err) =>
           {
               if (err != null)
               {
                   // TODO: log the error for review
                   // This could be a unique key contraint failing, but we do not want
                   // to reveal that information in case an attacker is fuzzing the
                   // system to discover which email addresses are registered.
                   // However, this information might be leaked anyway if the only
                   // cause of an error is a unique key constraint. This potential
                   // information leak should be evaluated.
                   req.session.registrationError = 'Unable to create the account. Please try again in a few minutes, or reset your password if you are already registered.';
                   req.session.registrationForm = registrationForm;
                   res.redirect(303, '/auth/register');
                   return;
               }

               // User was created successfully. Redirect to confirmation page.
               // TODO: Verify email ownership
               res.redirect('/auth/register/success');
           });
       });
   });
});
Allow me to explain what is going on there. First, we are ensuring that the email submitted looks like a valid email. Second, we are making sure that the password and the repeated password match: It is important that the user knows what their password is. Third, we are using our Authenticator module to validate the quality of the password. Fourth, we are using the Authenticator module to create a one-directional hash of the submitted password. Finally, we are creating a new user with the email submitted and the password hash we generated.
There are a few significant security related points to be made here.
- We are not storing the original password in the database
- We are not logging or recording the submitted password anywhere
- When any non-validation related error occurs, we are responding with the same error so that we don’t leak information. One error that may occur is that there is a unique key conflict for the email address. It would be useful to inform the user that they already have an account. However, it would also be useful to an attacker to be able to try a series of email addresses in order to discover which users have an account in the application. We must not leak information!
To be honest, I am not sure about point three above. If our system is operating properly, there is only one non-validation error that should feasibly occur, a unique-key constraint failure on the email address. An acute attacker would be able to deduce that this is the cause of the error, and they have discovered that there is an account on our system with the submitted email address. I have put a lot of thought into how we might be able to avoid this information leak. I haven’t been able to figure it out yet. At least we are aware of the problem and can be on the lookout for a solution.
Let’s create a basic implementation of the password validation function. We are going to dedicate an entire part of this series to password validation, so our version here will be embarrassingly basic.
Add this function to the Authenticator module at lib/security/Authenticator.js:
Authenticator.validatePassword = function validatePassword(password, callback)
{
   // TODO: robust password validation
   if (typeof password !== 'string')
   {
       setImmediate(callback, new Error('The password is not valid.'));
       return;
   }

   // Important note: This is completely inadequate
   if (password.length < 8)
   {
       setImmediate(callback, new Error('The password must be at least 8 characters long.'));
       return;
   }

   setImmediate(callback, null);
};

Authenticator.encryptPassword = function encryptPassword(password, callback)
{
   // TODO: actually encrypt the password
   setImmediate(callback, new Error('Not Implemented'));
};
If you restart the application, you should be able to submit the registration form. However, no matter the input, it should display an error since our encryptPassword function never succeeds.
Password hashing work factor
OK. We have made it to the point where we need to start talking about password encryption. It may be somewhat counter-intuitive, but a good algorithm for hashing a password is not the one that is most efficient. In fact we want to select an algorithm that we can deliberately make less efficient. The “work factor” of the algorithm needs to be tunable.
Work factor? What’s that? To answer that, let’s look at a discussion from the OWASP on the topic (note: the protect() function they reference is a call to perform a one-way password hash):
Since resources are normally considered limited, a common rule of thumb for tuning the work factor (or cost) is to make protect() run as slow as possible without affecting the users' experience and without increasing the need for extra hardware over budget. So, if the registration and authentication's cases accept protect() taking up to 1 second, you can tune the cost so that it takes 1 second to run on your hardware. This way, it shouldn't be so slow that your users become affected, but it should also affect the attackers' attempt as much as possible. While there is a minimum number of iterations recommended to ensure data safety, this value changes every year as technology improves. An example of the iteration count chosen by a well known company is the 10,000 iterations Apple uses for its iTunes passwords (using PBKDF2). However, it is critical to understand that a single work factor does not fit all designs. Experimentation is important. - https://www.owasp.org/index.php/Password_Storage_Cheat_Sheet#Work_Factor
Essentially, the selection of a work factor involves finding the right balance between user experience (less time to validate the password = less delay in the request = better user experience) and slowing an attacker down. How does a larger work factor slow an attacker down you might ask? To answer that, suppose that an attacker has somehow managed to get their hands on the encrypted version of the password. If they have the encrypted password, there is nothing stopping them from eventually discovering what the original password is by trying every possible password that exists and eventually finding a match. By increasing the work factor of the hashing function, we have increased the amount of computing time that their computer needs to do in order to perform a single validation of a possible password. Hopefully we slow them down enough and force them to use enough of their own resources that they do not consider cracking a password on our system a worthwhile endeavor. We want it to take years, possibly even decades or centuries, for them to be able to crack a password.
There is another important factor to consider here. If we want to deliberately make the hashing algorithm do more work and we are performing the work on our hardware, is it possible that we can make our hardware do too much work? The answer is yes. If we make the work factor too high, we can create a vulnerability where an attacker can submit a series of authentication requests, spawning a plethora of hashing processes, starving other processes in our application of resources, effectively making the application inoperable. This is something that we will need to protect against. To do this, we will need to implement a proper rate-limiting system and potentially limit the total number of authentication requests that the system is willing to handle simultaneously. We will address these problems in a future part of this tutorial series.
With all of this in mind, we need to select a one-way hashing algorithm implementation for our project. OWASP identifies 4 candidate algorithms: Argon2, PBKDF2, scrypt, and bcrypt. However, it is also stated that bcrypt should only be used if none of the other three are available, so it will certainly not be our first choice. Additionally, OWASP recommends Argon2 for all new projects. We are going to do what the OWASP recommends and use Argon2.
Install the argon2 library for node.
npm install –save argon2
Let’s do a little experiment to figure out how to configure the argon2 library to have the work factor we want. Create a file at scripts/argon2WorkFactorTest.js with these contents:
const MAX_TIMECOST = 500;
const TIME_COST_INTERVAL = 20;
const ITERATIONS = 10;
const TEST_PASS = 'this is an almost decent password';

const argon2 = require('argon2');

const results = {};

let currentTimeCost = 0;
let currentIteration = 0;


function measure(prev)
{
   if (prev)
   {
       const diff = process.hrtime(prev);
       return diff[0] + (diff[1] / 1e9);
   }
   return process.hrtime();
}

function nextTimeCost()
{
   currentTimeCost += TIME_COST_INTERVAL;
   currentIteration = 0;

   if (currentTimeCost > MAX_TIMECOST)
   {
       summarize();
       return;
   }

   results[currentTimeCost] = [];

   console.log(`testing time cost ${currentTimeCost}`);
   nextIteration();
}

function nextIteration()
{
   currentIteration += 1;
   if (currentIteration > ITERATIONS)
   {
       nextTimeCost();
       return;
   }

   const start = measure();

   argon2.hash(TEST_PASS, {timeCost: currentTimeCost, type: argon2.argon2id})
       .then(hash =>
       {
           const delta = measure(start);
           // console.log(`   iteration ${currentIteration}: ${delta}s`);
           results[currentTimeCost].push(delta);
           nextIteration();
       }).catch(err =>
       {
           console.log('there was an error', err);
           console.log('aborting...');
           process.exit(1);
       })
   ;

}

function summarize()
{
   const summaries = Object.keys(results).map((timeFactor) =>
   {
       const values = results[timeFactor].reduce(([min, max, total, count], delta) =>
       {
           min = Math.min(min, delta);
           max = Math.max(max, delta);
           total = total + delta;
           count += 1;

           return [min, max, total, count];
       }, [Infinity, -Infinity, 0, 0]);

       return [timeFactor].concat(values);
   });
   console.log('\nsummary:');
   summaries.forEach((summary) =>
   {
       console.log(` ${summary[0]}: min=${summary[1]}, max=${summary[2]}, mean=${summary[3]/summary[4]}`);
   });
}

console.log(`running work factor test with max time cost of ${MAX_TIMECOST} and ${ITERATIONS} iterations`);

nextTimeCost();
Feel free to adjust the MAX_TIMECOST, TIME_COST_INTERVAL, and ITERATIONS constants to suit your needs.
Run the tests with:
node scripts/argon2WorkFactorTest.js
On my machine I get the following output:
summary:
 20: min=0.059169926, max=0.115384768, mean=0.07352601480000001
 40: min=0.118614618, max=0.131965723, mean=0.1233558119
 60: min=0.173242511, max=0.233742589, mean=0.19095725090000001
 80: min=0.233093269, max=0.245710147, mean=0.23883808899999998
 100: min=0.286194211, max=0.348529288, mean=0.3056723966
 120: min=0.345307733, max=0.368384522, mean=0.3500421124
 140: min=0.404281482, max=0.425490633, mean=0.40981786070000004
 160: min=0.46184585, max=0.499447518, mean=0.4727067024
 180: min=0.519093677, max=0.632982076, mean=0.5349037241
 200: min=0.574309246, max=0.58568454, mean=0.5798110268999999
 220: min=0.631910721, max=0.640224928, mean=0.6370991436000001
 240: min=0.689322365, max=0.704203659, mean=0.6949076245
 260: min=0.750647261, max=0.756753788, mean=0.7539704667
 280: min=0.804289885, max=0.817988519, mean=0.8111270963999999
 300: min=0.863234896, max=0.875138488, mean=0.8703975496000002
 320: min=0.923575147, max=0.934663627, mean=0.9276984625000001
 340: min=0.981271469, max=0.986834434, mean=0.9838223343000001
 360: min=1.037853295, max=1.051877342, mean=1.0425444121
 380: min=1.09235265, max=1.107978287, mean=1.1000638958
 400: min=1.151989068, max=1.1671535259999999, mean=1.1599749472999998
 420: min=1.207392533, max=1.49469471, mean=1.3101527484000002
 440: min=1.279018391, max=1.575205873, mean=1.4832863274999997
 460: min=1.328550905, max=1.349583719, mean=1.3377557366000001
 480: min=1.384458, max=1.408919561, mean=1.3938529500999999
 500: min=1.443234654, max=1.46103395, mean=1.4524595427999998
To find the right configuration, we want to find the time cost value that has a mean near how long we want the hashing process to take. The time you choose depends a lot on your application’s business requirements. For the example application, I am going to look for a work factor of approximately half a second. According to my results, this lies somewhere between a timecost value of 160 and 180. We will go with 175.
Please note that these results are highly dependent on the hardware they are running on. You should run a test like this one on your production machine in order to calibrate your encryption work factor.
Storing a user’s authentication data
Never store a user’s unencrypted password! Just to emphasize the point, I am going to repeat it: Never store a user’s unencrypted password! Don’t put it in the database. Don’t log it to stdout or to a file. If your application is written correctly, there is no way for even you to discover the password of one of your users.
Rather than storing the user’s plaintext password, we store a hash of the password. To validate the password at login, we perform the same hashing algorithm on the submitted password. If the two hashed values match, the password must be correct.
Let’s implement the password encryption routine in our Authenticator module. First, add an environment variable to .env file so that we can configure the work factor of argon2.
# configure work factor for argon2
MYAPP_ARGON2_TIMECOST=175
And then in your app.js file, add the following somewhere near the top.
const Authenticator = require('./lib/security/Authenticator');
Authenticator.configure(env);
Add the configure function to our Authenticator module.
Authenticator.configure = function configureAuthenticator(env)
{
   const {
       argon2Timecost,
   } = env;

   Authenticator.argon2Timecost = argon2Timecost;
};
At the top of the Authenticator module file, require the argon2 library.
const argon2 = require('argon2');
Finally, let’s update the Authenticator’s encryptPassword function:
Authenticator.encryptPassword = function encryptPassword(password, callback)
{
   argon2.hash(password, {timeCost: Authenticator.argon2Timecost, type: argon2.argon2id})
       .then(hash =>
       {
           callback(null, hash);
       })
       .catch((err) =>
       {
           // TODO: log this as a critical error
           callback(err);
       })
   ;
};
That should be everything we need to finally create a user. Go ahead and restart the application and give it a try. (Note: be careful not create two users with the same email address since we don’t have any real unique indexes in the database).
If everything works as expected, you will see a success page.
 If you peak in your database you should find a user record that looks something like this:
{
   "_id" : ObjectId("5ae6a9b9a3bb140f03f0271b"),
   "email" : "me@mydomain.com",
   "hashedPassword" : "$argon2id$v=19$m=4096,t=175,p=1$Cty5zlMdRyZiN6EZkVQc+w$Ly7y+clSTnVmz/Q/gqQDeatM60E6CqODwYZMasjE7cA"
}
Success! We have completed another OWASP authentication security requirement.
2.13 - Verify that account passwords are one way hashed with a salt, and there is sufficient work factor to defeat brute force and password hash recovery attacks.
BTW, the salting of the password is being automatically handled by argon2 library here, so we don’t have to worry about. For a brief explanation of the purpose of the salt, see https://www.owasp.org/index.php/Password_Storage_Cheat_Sheet#Use_a_cryptographically_strong_credential-specific_salt. Primarily, it adds variability to the result of hashing a password so that the same password does not always result in the same hash value. If the passwords were not salted and a set of password hashes was somehow compromised, an attacker could eventually create a dictionary of hashes to passwords making their objective much easier. Also, if they found two hashes that were the same, they would know that they were generated from the same password.
Verifying a user’s authentication credentials
We have on task left to do before we can wrap up the first part of this tutorial: Validate the user’s password when they login. Replace our Authenticator module’s current authenticate function with this one:
Authenticator.authenticate = function authenticateUser(credentials, callback)
{
   const {
       email,
       password,
   } = credentials;

   if (typeof email !== 'string')
   {
       setImmediate(callback, null, null);
       return;
   }

   User.findOne({email}, (err, user) =>
   {
       if (user == null)
       {
           callback(err, null);
           return;
       }

       const {hashedPassword} = user;

       // We test the hash value's prefix so that if we ever need to update the
       // algorithm we are using, we will be able to figure out which algorithm
       // was used when we originally generated the hash. For a discussion
       // on this topic see https://veggiespam.com/painless-password-hash-upgrades/
       if (/^\$argon2id\$/.test(hashedPassword))
       {
           argon2.verify(hashedPassword, password)
               .then((match) =>
               {
                   if (match)
                   {
                       // Password is good!
                       // TODO: log this for auditing
                       callback(null, user);
                   }
                   else
                   {
                       // Invalid password!
                       // TODO: log this for auditing
                       callback(null, null);
                   }
               })
               .catch((err) =>
               {
                   // Argon2 had an internal error
                   // TODO: log this as a critical failure
                   callback(err);
               })
           ;
       }
       else
       {
           callback(new Error('Unknown hashing algorithm'));
       }
   });
};
The process here is fairly straight forward. First, we lookup the user with the provided email address. If the user is not found, we immediately respond with a null user, indicating that the authentication failed. If we found a user, we run the argon2 library’s verify routine with the encrypted password we stored in the database for the user and the password received from the login form. The verify routine will run exactly the same hashing process on the input password that was performed on the user’s actual password. If that process results in a hash that is the same as the stored version, we know the password must be correct and we callback with the user to indicate that authentication succeeded.
There is a little bit of code in the function to lay the groundwork for future work on being able to manage the process of upgrading the hashing algorithm that we use in case we ever need to upgrade. We may return to this idea in a future edition of this tutorial.
If you restart the application and attempt to login with a valid password, you should finally be taken to a success page. If you login with a bad password, you should see an error message.

Of course, you can’t actually login since we are not storing any session information or generating any user tokens. We will return to the topics of session and token management in the next part of this series.
Progress
The very last thing we are go to do before we finish here is to track the progress we have made, and list out the requirements that we still need to complete.
Things that are done:
- Verify that account passwords are one way hashed with a salt, and there is sufficient work factor to defeat brute force and password hash recovery attacks.
- Verify that all application data is transmitted over an encrypted channel (e.g. TLS).
Ongoing requirements that we have not yet violated:
- Verify that the application does not automatically fill in credentials – either as hidden fields, URL arguments, Ajax requests, or in forms, as this implies plain text, reversible or de-cryptable password storage. Random time limited nonces are acceptable as stand ins, such as to protect change password forms or forgot password forms.
- Verify all authentication controls fail securely to ensure attackers cannot log in.
- Verify there are no default passwords in use for the application framework or any components used by the application (such as “admin/password”).
- Verify that secrets, API keys, and passwords are not included in the source code, or online source code repositories.
Requirements we still need to complete:
- Verify all pages and resources are protected by server-side authentication, except those specifically intended to be public.
- Verify password entry fields allow, or encourage, the use of passphrases, and do not prevent long passphrases or highly complex passwords being entered.
- Verify all identity functions (e.g. forgot password, change password, change email, manage 2FA token, etc.) have the security controls, as the primary authentication mechanism (e.g. login form).
- Verify that the changing password functionality includes the old password, the new password, and a password confirmation.
- Verify that all authentication decisions can be logged, without storing sensitive session identifiers or passwords. This should include requests with relevant metadata needed for security investigations.
- Verify that the forgotten password function and other recovery paths do not reveal the current password and that the new password is not sent in clear text to the user. A one time password reset link should be used instead.
- Verify that information enumeration is not possible via login, password reset, or forgot account functionality.
- Verify that anti-automation is in place to prevent breached credential testing, brute forcing, and account lockout attacks.
- Verify that all authentication credentials for accessing services external to the application are encrypted and stored in a protected location.
- Verify that forgotten password and other recovery paths use a TOTP or other soft token, mobile push, or other offline recovery mechanism. The use of SMS has been deprecated by NIST and should not be used.
- Verify that account lockout is divided into soft and hard lock status, and these are not mutually exclusive. If an account is temporarily soft locked out due to a brute force attack, this should not reset the hard lock status.
- Verify that if secret questions are required, the questions do not violate privacy laws and are sufficiently strong to protect accounts from malicious recovery.
- Verify that high value applications can be configured to disallow the use of a configurable number of previous passwords.
- Verify that sensitive operations (e.g. change password, change email address, add new biller, etc.) require re-authentication (e.g. password or 2FA token). This is in addition to CSRF measures, not instead.
- Verify that measures are in place to block the use of commonly chosen passwords and weak pass-phrases.
- Verify that all authentication challenges, whether successful or failed, should respond in the same average response time.
- Verify that users can enroll and use TOTP verification, two-factor, biometric (Touch ID or similar), or equivalent multi-factor authentication mechanism that provides protection against single factor credential disclosure.
- Verify that access to administrative interfaces are strictly controlled and not accessible to untrusted parties.
- Verify that the application is compatible with browser based and third party password managers, unless prohibited by risk based policy.
Wow! There is a lot left to do. I told you that properly implementing an authentication system is not a trivial task. To be fair to ourselves, a lot of what we did during this tutorial laid the groundwork for future work.
And that will do it. Be on the lookout for part two.
